The Skyless Realms was a kickstarter for some .stl-files that funded recently and delivered just a couple weeks ago. The theme was buildings, scatter terrain and miniatures of several kinds that would typically found in the Underdark setting for D&D. Centered around spider-worshipping Dark Elves, there are a bunch of classic cave and dungeon monsters, Deep Gnomes, Gray Dwarves, lizardfolk and the obligatory tentacle-faced horrors that want to suck out your brains. A whole lot of stuff!
Now, I have a two year old cheapo flashforge finder FDM-printer that only uses PLA material. It is great for terrain and buildings, but not so great for miniatures because of the unsightly print lines and such.
However… the print lines are really not all that bad, especially when seen on the table and not in extreme close-up as in the photos.
And I even printed these at the “normal” settings which have a .18mm layer height and not the “hyper” settings which has a .08mm layer height.
Each of the smaller myconids took less than an hour to print, and the Behemoth about four hours in a single piece.
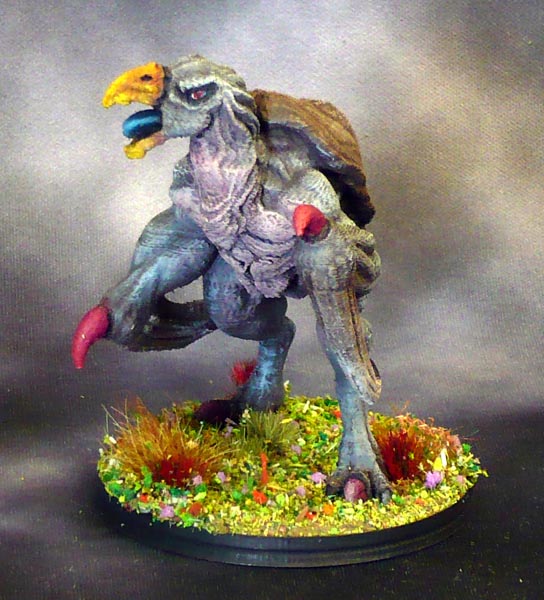

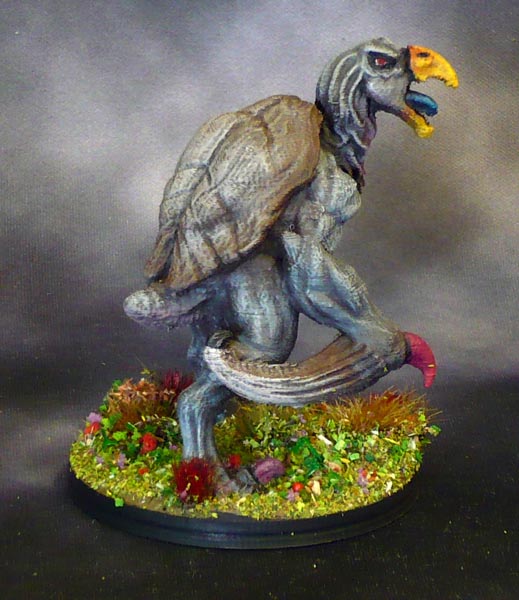
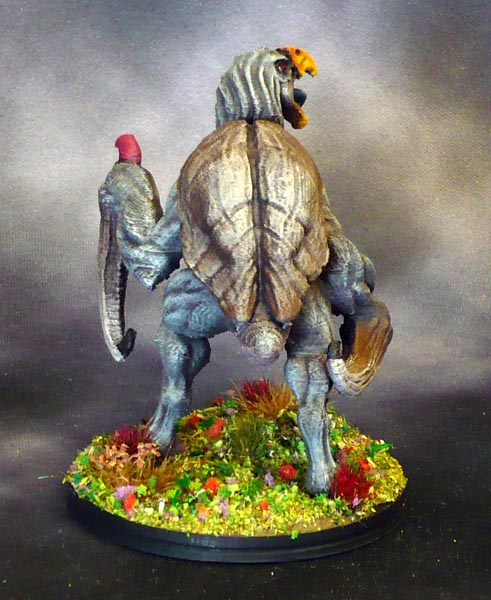
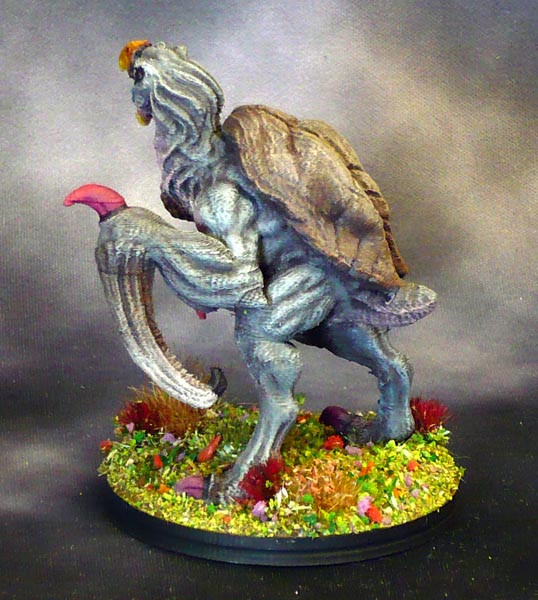
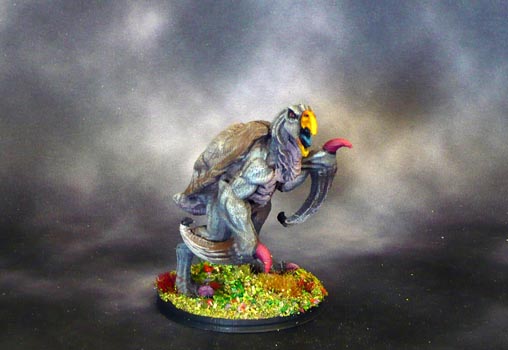
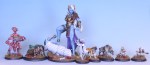
The “Hook Clacker”, which would be the D&D Hook Horror. 48mm integral base, printed in a single piece, with supports.
I drybrushed this a lot, which really brings out all the printlines!
I find that my printer leaves a “fur” of fine, hair-like strings when printing rounded details. Trying to take this fur off the old fashioned way with knives, files or scrapers is contraindicated as it is a really annoying chore to do and the results are less than optimal.
But then a blast of inspiration hit me: KILL IT WITH FIRE!
Now I burn the fur off by rapidly flicking a lighter’s flame over the model in short, controlled bursts.
Outdoors, as the resulting fumes and smell are not welcome indoors.
PLA has a relatively low melting point, so this needs to be done quickly and carefully so the other details are not affected. It literally takes less than a second to clear off the offending fur-material.
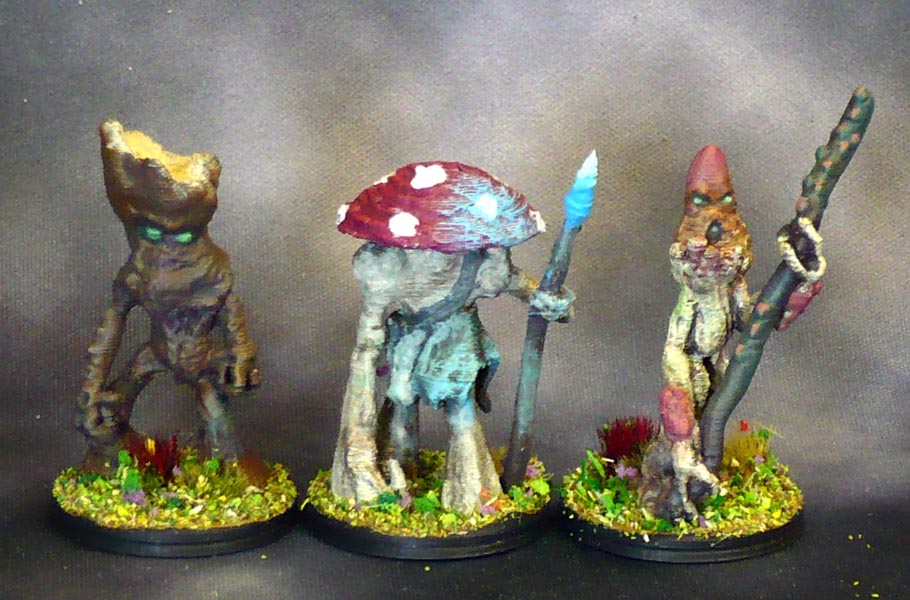
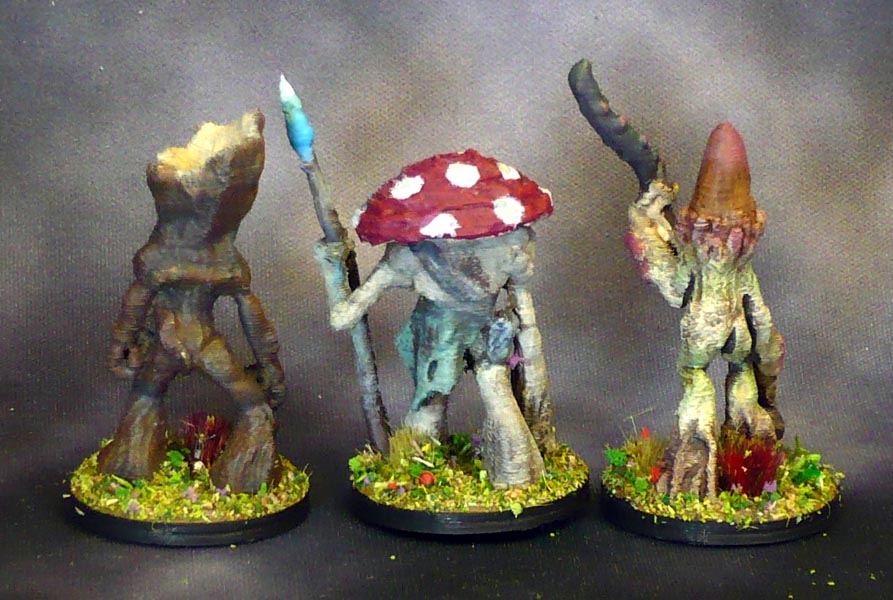
The three Myconids. 25mm integral bases. The one in the middle is in two pieces (the toadstool cap), the others are single piece prints.
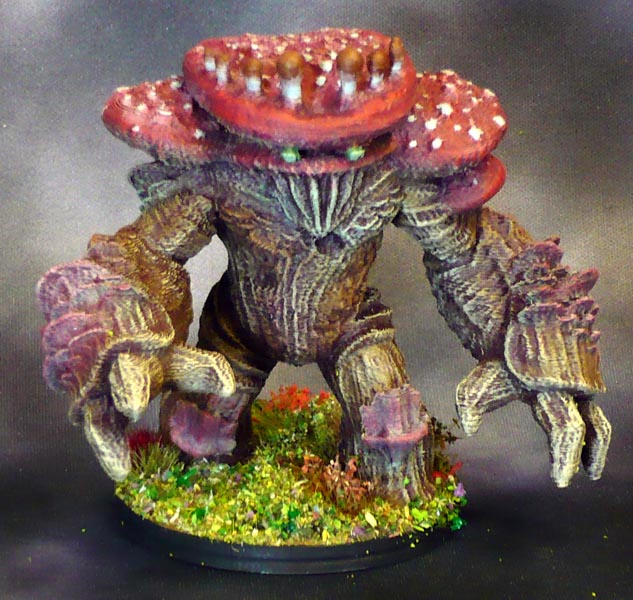
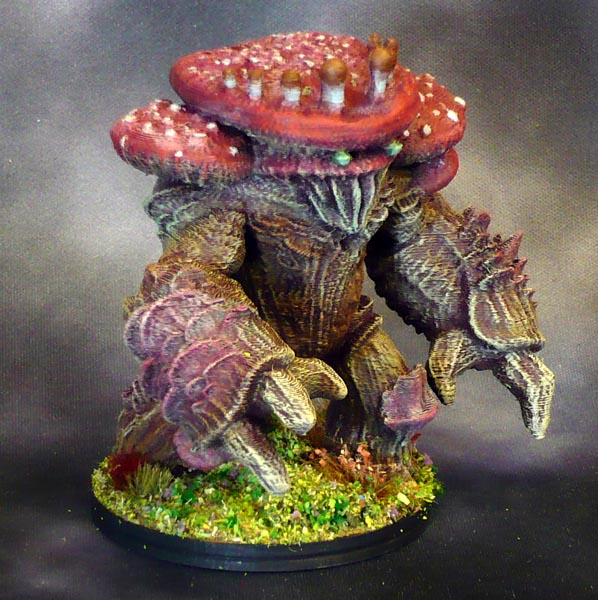
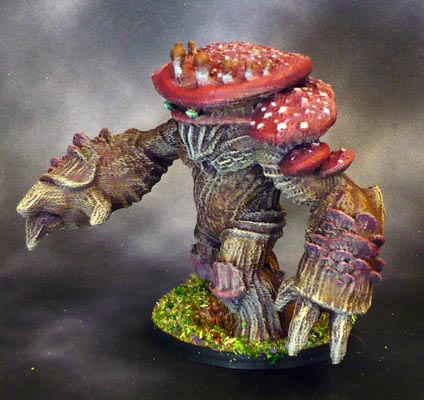
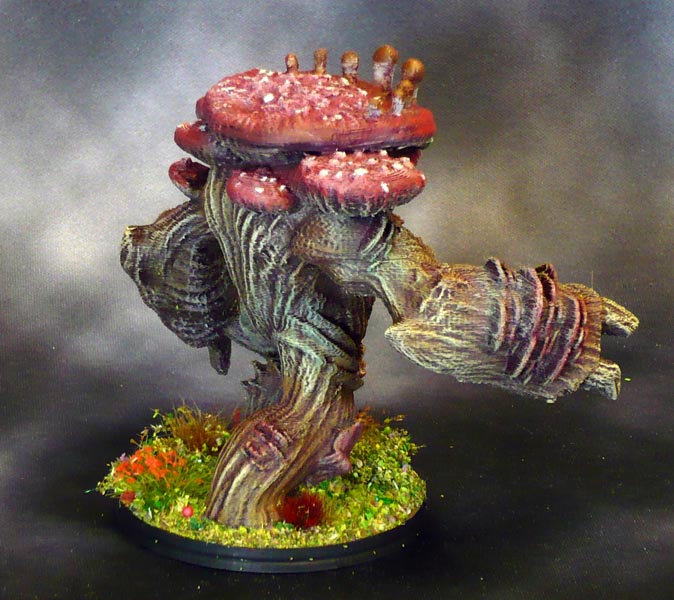
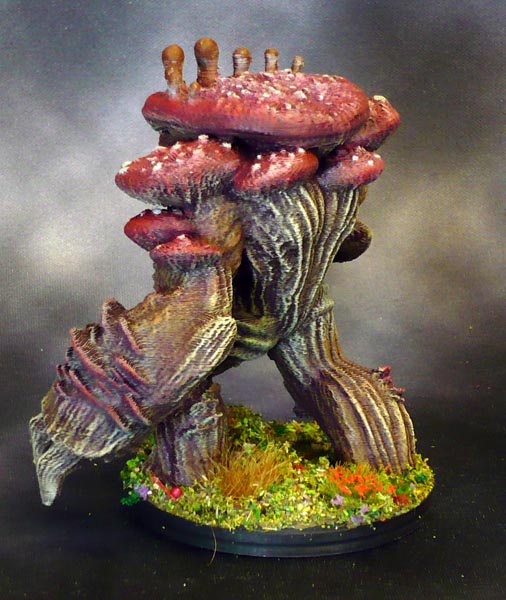

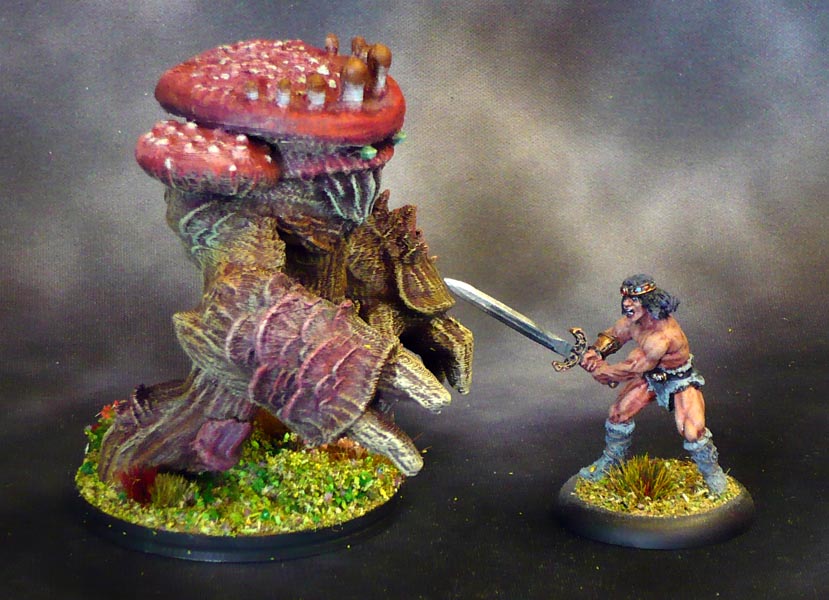
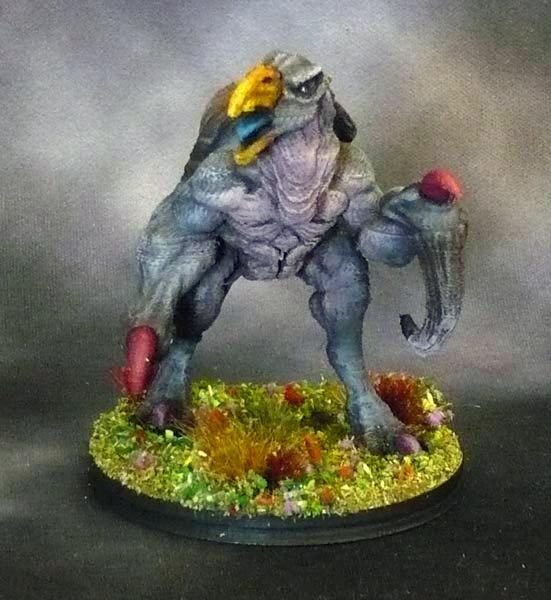
The Myconid Behemoth. Also a single piece print. The “eyes” are actually bits of the supports that I chose to leave on, as they gave it an interesting face. I expect the crown of toadstools might be meant to be eyes on stalks.
48mm integral base.
What gets me every time I 3D-print something, is that there was nothing there, and suddenly there is a miniature! Just like that! Tea. Earl Grey. Hot.
Painted so far this year: (Miniatures: 82 /365 goal // scenery and terrain: 10)
January: 30
February: 44 // 10
March: 8

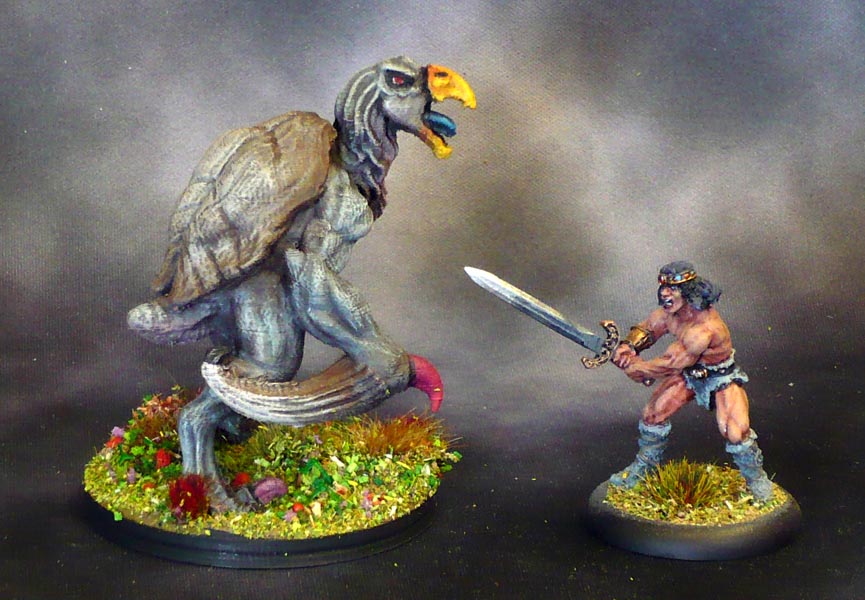
They’ve all turned out really cool. Love the Hook Horror and the Myconid Behemoth in particular.
i love the prints they look great, i have a question about the barbarian mini you are using for the images as well. Did you print him out with the Finder. i am having trouble printing out minis on my FlashForge Finder. i have been searching for months now on someone who has the settings down for minis for Flash Print with no luck. i would love to know what your settings were. Thanks and keep up the awesome prints.
Hello Luke, thank you for your comment.
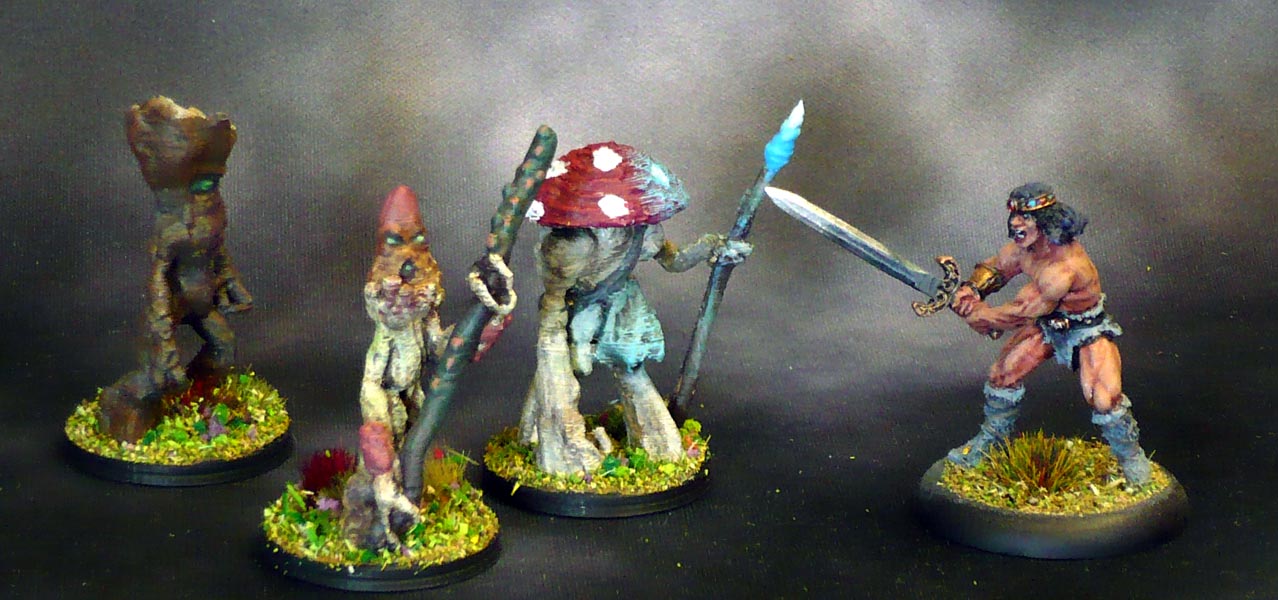
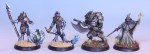
The barbarian is a Reaper Dark Heaven metal miniature 02233 “Dantrag of Heimdall”. I have used this mini for comparison shots for a long time.
My settings are actually one of the default settings from the Flashprint slicer program I got with the printer. The setting I used on these is “Standard”, with 0.18mm layer height and 0.27mm first layer. Shell: perimeter 2mm, top and bottom layers 3mm
infill 15%, hexagon pattern, combine every second layer
print speed 60mm/s, travel 80mm/s
temperature 220 degrees C
enable supports, auto made treelike supports,
no brim or raft (the minis have bases, so they do not need this)
For other minis I have used the “high” and “hyper” settings, depending on the level of detail they need to carry, The rest stays the same.
make sure to lubricate the screw at the back of the printer that the print bed travels up and down on, also make sure that the bed is properly level, and that there is no draught / air movement around the print as this may lead the print to warp or peel off the printbed.
I cover my printer with it’s upside down box when printing to avoid the draughts.
Hope this helps!